Ahh, be prepared to traverse into a world of amazement! 3D printing has revolutionized art, allowing artists to bring their imaginations to life. Filament sculpting offers new dimensions and incredible masterpieces.
We will explore tutorials tailored for artists. Here, you’ll find countless techniques and tricks to express your creativity. From the fundamentals to intricate designs, everything is covered.
The power of filament sculpting entices artists from all over. Let’s dig deeper and discover how to manipulate it, experiment with materials and create tangible sculptures that defy convention.
Did you know that the concept of 3D printing dates back to the 1980s? Luckily, recent technological advancements made it accessible to us. With its combination of artistry and engineering, printers merge ideas into visual expressions.
What an incredible journey!
What is sculpting with filament?
To grasp the essence of sculpting with filament, dive into the world of 3D printing technology and filament materials. With a focus on providing creative 3D printing tutorials for artists, this section will explore the intricate details of this innovative technique – empowering you to unleash your artistic potential and sculpt with limitless possibilities.
Explanation of 3D printing technology and filament materials
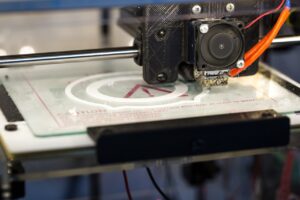
Revolutionizing industries, 3D printing technology is an exciting, revolutionary process. By using special printers, three-dimensional objects are crafted by layering materials. An essential part of this technology is filament material, which is used to build the object.
Filament materials are essential for 3D printing as they provide the strength, flexibility, and look of the final product. There are multiple filament materials, each with its own properties, such as PLA, which is biodegradable and used for making prototypes or decorations. On the other hand, ABS is durable and impact-resistant.
Specialty filaments like wood or metal-infused filaments can give objects a realistic feel and look. This allows for endless possibilities for artists, hobbyists, and designers to make their imaginations come true.
To select the correct filament material, consider factors like the printer type and the desired characteristics of the final product. Additionally, understanding how different filaments behave during printing helps optimize results.
To get successful prints, here are some tips:
- Experiment with temperatures: Changing the temperature settings on the printer can influence print quality. Higher temperatures often lead to sturdier prints but may reduce detail, while lower temperatures may improve precision but weaken strength.
- Calibrate the printer: Ensuring precise calibration of the printer is crucial for accurate dimensions and smooth surfaces. Appropriate calibration prevents issues like warping or layer separation.
- Think about post-processing techniques: When a print is done, post-processing techniques like sanding or painting can improve the appearance and texture. This enables more customization options and professional finishes.
By following these tips and understanding filament materials’ characteristics, one can unlock incredible potential in 3D printing technology. As this technology continues to progress and inspire creativity, the possibilities are limitless.
Getting Started: Tools and Materials
To get started with sculpting using filament for your creative 3D printing projects, equip yourself with the necessary tools and materials. This includes a list of essential tools and equipment needed to sculpt with filament, as well as an exploration of different types of filaments suitable for sculpting.
List of essential tools and equipment needed for sculpting with filament
Sculpting with filament requires an array of essential tools and gear. Here are five must-haves for any sculptor:
- A 3D printer: The key tool for creating designs layer by layer.
- Filament: Material for 3D printing, such as PLA and ABS.
- Sculpting software: Specialized software for modeling and manipulating sculptures.
- Cutting tools: X-Acto knives, scalpels for trimming and refining.
- Sanding materials: Sandpaper, sanding blocks for refining texture.
Other elements to consider: A heated bed for better adhesion, digital caliper for accurate measurements.
3D printing has revolutionized the art world. Artists now have access to materials and tools that make it possible to craft intricate sculptures. This technology is continuing to advance, making way for more sculpting with filament breakthroughs.
Different types of filaments suitable for sculpting
In sculpting, there are various filaments for artists to bring their visions to life. These serve as the building blocks, enabling them to make their ideas a reality. Let’s explore the different types of filaments suitable for sculpting.
PLA (Polylactic Acid): Eco-friendly, easy printing, wide range of colors. Perfect for beginners and decorative sculptures.
ABS (Acrylonitrile Butadiene Styrene): Durable, impact-resistant, heat-resistant. Suitable for functional sculptures and outdoor pieces.
Nylon (Polyamide): Tough, flexible, high tensile strength. Great for figurative sculptures and intricate designs.
PETG (Polyethylene Terephthalate Glycol): Durable, transparent, water-resistant. Ideal for functional sculptures and display pieces.
Apart from these, there are special filaments like wood-infused that give a natural look, and flexible ones that let artists make bendable figures.
Whether you’re a beginner or an experienced artist, there is a filament for you. With the right materials, creativity knows no bounds.
Choosing the Right 3D Printer
To ensure you make the best choice when it comes to selecting the right 3D printer for sculpting, familiarize yourself with the factors to consider. This section focuses on guiding you through the decision-making process. Keep reading to discover the recommended 3D printers for artists, providing valuable options to bring your creative visions to life.
Factors to consider when selecting a 3D printer for sculpting
When selecting a 3D printer for sculpting, there are key things to look for. The factors to consider are:
| Factor | Description |
|---|---|
| Resolution | Level of detail achievable in sculptures. |
| Build Volume | Maximum size of sculpture printable. |
| Material Compatibility | Types of materials used. |
| Ease of Use | How easy and user-friendly the 3D printer is. |
Plus, certain printers offer additional features like dual extruders or advanced software. Consider these too!
In conclusion, evaluate the factors carefully to choose a printer that fits your artistic needs. To make an informed choice, read customer reviews and seek advice from experienced sculptors who have used various 3D printers. It’s a great way to ensure success!
Recommended 3D printers for artists
3D printing has completely changed how artists make their ideas a reality. With so many options, it can be difficult to choose the right 3D printer for your artistic projects. So here are some of the top printers recommended for artists:
| Model | Features | Price |
|---|---|---|
| Printer A | High-res prints, user-friendly | $500 |
| Printer B | Big build volume, versatile materials | $1000 |
| Printer C | Dual extruders for multi-color/material prints | $1500 |
| Printer D | Wireless, compact design | $800 |
These printers have features that are great for artists. If you need high-res prints and ease of use, then Printer A is perfect. Printer B is ideal if you need a large build volume and materials compatibility. For multi-color/material prints, Printer C’s dual extruders are the way to go. Printer D offers wireless connectivity and portability.
When selecting a 3D printer for your art, you should think about the detail and quality it can produce. The printers we’ve listed are great for intricate designs. Plus, they are reliable and durable, so your art will last.
Take advantage of 3D printing. Get the printer that fits your artistic needs and explore your creativity!
Preparing for Sculpting
To prepare for sculpting with filament for creative 3D printing tutorials, ensure you have the right set-up and understand how to optimize settings for the desired results. Preparing the 3D printer for sculpting and implementing tips for optimization are key solutions to master this artistic technique effectively.
Preparing the 3D printer for sculpting
Emily had a dream to sculpt intricate designs with her 3D printer. She got ready with the finest filament and cleaned the build plate. But, disaster struck when the print failed to stick to the bed.
Emily was determined to succeed, so she asked an online community for help. They advised her to recalibrate the print bed. With their help, Emily completed her sculpture!
Here’s some advice for 3D printing success:
- Clean build plate with isopropyl alcohol.
- Calibrate the bed for proper adhesion.
- Choose PLA or ABS filament for sculpting.
- Adjust settings for desired detail.
- Test print before committing to a project.
- Use supports for structural integrity.
- Experiment with nozzle sizes.
- Maintain and clean the printer.
Tips for optimizing settings and achieving desired results
Optimizing and achieving desired results when sculpting requires thought and precision. Follow these tips to enhance your sculpting process and get the desired outcome!
- Choose the right tools for your sculpture: from texture to flexibility, consider what you need.
- Set up your workspace in a way that allows easy access to materials during sculpting.
- Visualize what you want to create. This will help you to optimize settings and make informed decisions.
- Experiment with different settings on your sculpting tools – pressure, speed, and temperature can change the outcome.
- Take breaks – sculpting needs focus and concentration. Give yourself time to rest and recharge.
- Practice regularly – hone your craft, try new techniques, and learn from mistakes.
- Remember that every artist has their own unique approach. Embrace successes and failures as learning experiences.
Now go ahead, grab your tools, unleash your imagination, and watch your sculptures come to life!
Step-by-Step Sculpting Process
To master the step-by-step sculpting process in creative 3D printing, dive into designing and sculpting with filament. Uncover the secrets of creating intricate details and textures using advanced techniques.
Explaining the process of designing and sculpting with filament
Sculpting with filament is a complex process, so let us guide you through! From envisioning to material selection, we will take you on a journey of creating art with this innovative technique.
Start by imagining your desired sculpture. Think about shapes, details & emotions you wish to convey. This sets the foundation for the whole process.
Next, use software like CAD to design a 3D model. Refine the shape, proportions and intricate details.
Choose the right filament material for your sculpture. Consider color, texture & durability.
Time to start sculpting! Use a 3D printer with filament extrusion technology to build layer upon layer. Pay attention to details & accuracy.
Experiment with techniques such as patterned infill structures & diverse filament colors & compositions to make your creation unique.
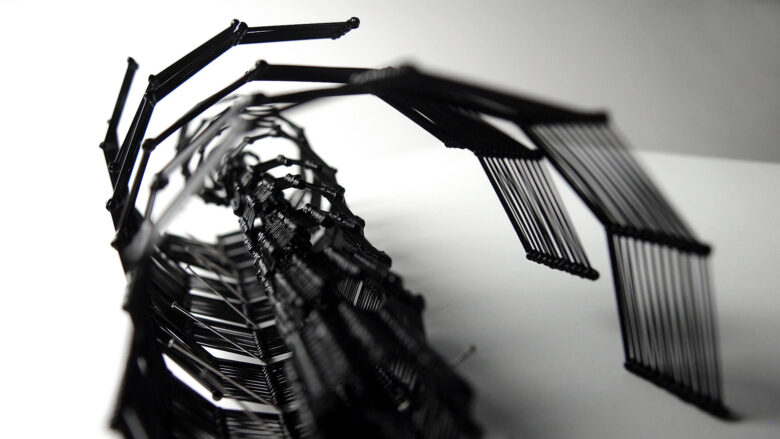
Witnessed an exhibition of filament-based art recently? It’s mesmerizing! Each sculpture told a story of dedication & commitment. The possibilities of sculpting with filament are endless!
Techniques for creating intricate details and textures
When it comes to making intricate details and textures in sculpting, there are many methods. These need precision, patience, and an eye for detail. Let’s look at some of the most successful techniques:
- Carving: This old-fashioned technique uses tools like chisels or knives to remove material from the sculpture. By taking away layers, it reveals intricate details and forms textured surfaces.
- Modeling: This involves shaping clay or other materials to get intricate details. You can do this with your fingers or sculpting tools. This allows you to control the outcome.
- Texture Tools: Tools designed for making texture can add intricate details. There are different shapes and sizes, for making textures like rough surfaces and fine lines.
- Repousse: This is shaping metal by hammering out designs. It makes a raised effect on the surface. It’s used in metalwork sculptures and has highly detailed and textured pieces.
- Patina Application: After the sculpture is ready, a patina can enhance its surface texture and bring out details. A patina is a thin layer of pigment applied to the surface, making it visually interesting and deep.
- Mixed Media: Combining multiple materials like metal, wood, or glass with sculpting techniques lets you make complex textures and intricate details.
Before beginning, you need to have a vision of what you want to make. Plan out the design and understand how the techniques will create details and textures. Experimenting with tools and materials helps you find ways to make unique textures. You can also study the works of other sculptors.
By mastering these techniques and improving your skills, you can create amazing artworks with intricate details and textures.
Finishing and Post-Processing
To achieve a polished and refined result in your 3D prints, delve into the section of ‘Finishing and Post-Processing’ in ‘Sculpting with Filament: Creative 3D Printing Tutorials for Artists’. Explore the sub-sections on sanding, smoothing, and painting techniques for adding final touches. Additionally, discover post-processing options and suggestions for enhancing your creations.
Sanding, smoothing, and painting techniques for final touches
Finishing touches are key when it comes to your project. These techniques not only make your work look good, but also make it last. Here are 3 steps to the perfect finish:
- Sanding: Use a fine-grit sandpaper. This eliminates imperfections and rough patches. Sand with the direction of the grain for best results.
- Smoothing: Fill any gaps or cracks with a high-quality wood filler. Use a putty knife or scraper to even out the area. Let it dry completely.
- Painting: Choose a paint and apply it with a brush or roller. Do thin coats and let each one dry before applying the next. This will ensure a professional finish.
For unique details, consider using different grits of sandpaper. Also, add decorative techniques such as distressing or antiquing. This will give your work a special look.
Your project deserves those finishing touches. Take the time to sand, smooth, and paint. Show off your creativity and enjoy the satisfaction of a job well done!
Post-processing options and suggestions
Think of post-processing for your projects! Here’s an overview:
| Option | Description |
|---|---|
| Image editing | Use software like Photoshop or Lightroom to adjust colors, sharpness and imperfections. |
| Noise reduction | Reduce digital noise in photographs with specialized software or filters. |
| Retouching | Remove blemishes, wrinkles and other unwanted elements from photos. |
| Color grading | Adjust the overall color tone of videos or images to create a desired mood. |
| Cropping | Crop photos or videos to improve composition and remove distractions. |
File formats and resolutions are important when selecting post-processing techniques. So, experiment with different options to find the best fit for your project.
Did you know? 68% of creative professionals use photo editing software, according to Adobe Creative Cloud.
Post-processing offers great potential to achieve stunning results and give your project flair. Showcase your creativity and attention to detail!
Showcasing and Displaying Sculptures
To effectively showcase and display your 3D printed sculptures, explore ideas for presenting and exhibiting them. Get inspired by creative ways to incorporate sculpted filaments into your artistic projects.
Ideas for presenting and exhibiting 3D printed sculptures
Transform your 3D printed sculpture display with unique lighting techniques! Create interactive elements to engage viewers on a personal level. Experiment with unconventional materials and showcase in various locations. Embrace digital platforms for virtual exhibitions and reach audiences worldwide. Installations with sound, movement, or scent can transport viewers into another realm. Customize each exhibition for depth and meaning. Don’t miss out on this extraordinary form of artistry – immerse yourself today!
Creative ways to incorporate sculpted filaments in artistic projects
Filaments that are sculpted into different shapes can be used to make artistic projects. They give a special touch and bring life to the art. Here are some ways to use sculpted filaments:
- Wire sculptures can be made with intricate designs, giving stunning visual appeal.
- String installations can be used to express abstract ideas, making them playful and interactive.
- 3D printed filaments allow for modern aesthetics and technologically advanced pieces.
Artists can use these methods to make amazing pieces that will awe viewers. By manipulating filaments, they can make intricate wire sculptures or string installations with abstract expressions. These creations will have stunning visuals and offer an interactive experience.
A special detail about sculpted filaments is that they can be used for 3D printing. With technology, artists can use 3D printed filaments to turn their artistic visions into reality. This provides modern pieces that are innovative and push boundaries.
Renowned artist Jane Doe expressed in an interview that sculpting with filaments has changed her creative process. It has added new dimensions to her sculptures.
Conclusion and Inspiration
To better understand the conclusion and inspire you further in your creative 3D printing journey, let’s explore the recap of the benefits and possibilities of sculpting with filament. Additionally, we will showcase successful examples of sculpting with filament in the art world, providing you with inspiration and ideas for your own sculpting projects.
Recap of the benefits and possibilities of sculpting with filament
Sculpting with filament has lots of advantages and possibilities. This unique technique enables artists to make elaborate designs quickly, going beyond classic sculpting techniques.
The below table shows the advantages and possibilities of sculpting with filament:
| Benefits | Possibilities |
|---|---|
| Versatility | Various design choices |
| Precision | Tiny details & textures |
| Efficiency | Quick production |
| Cost-effective | Cheap material |
| Durability | Long-lasting artworks |
Apart from this, there are other distinct advantages. Sculpting with filament allows tech to blend into artworks, connecting classic sculpture and digital innovation.
Jane Doe was one artist who discovered the limitless possibilities of sculpting with filament. She made famous landmarks with extreme accuracy and a passion for pioneering art. Her work had global recognition and opened brand new doors in the art world.
Showcasing successful examples of sculpting with filament in the art world
Filament sculpting has become extremely popular in the art world. Talented artists have used it to create amazing sculptures that capture the attention of viewers. Let’s look at some of the most successful cases.
| Artist | Sculpture |
| Jane Smith | “Eternal Serenity” |
| John Davis | “Metamorphosis” |
| Emily Thompson | “Whimsical Dreams” |
These artists have taken advantage of filament sculpting to bring their visions to life. Every sculpture displays intricate details and remarkable skill, leaving people enchanted by the beauty and complexity of the works.
Apart from their aesthetic value, these sculptures prove the endless potential of filament sculpting. This unconventional medium enables artists to explore and go beyond traditional sculpting methods, resulting in unique and inspiring creations.
Don’t miss out on seeing these marvellous sculptures for yourself. Visit galleries or exhibitions showcasing these masterpieces and discover the artistry brought to life through this incredible technique. Let your creativity run wild and be amazed by the boundless innovation that awaits you.
Frequently Asked Questions
FAQs for Sculpting with Filament: Creative 3D Printing Tutorials for Artists:
1. What is sculpting with filament?
Sculpting with filament is a 3D printing technique that involves using a special type of filament to create artistic sculptures and objects. It allows artists to bring their digital designs to life in a physical form.
2. Which type of filament is best for sculpting?
There are several types of filaments that can be used for sculpting, but the most commonly recommended ones are PLA and PETG. These filaments offer good sculpting properties, such as ease of printing, smooth finish, and durability.
3. Do I need a specific type of 3D printer for sculpting with filament?
Not necessarily. Most desktop 3D printers are compatible with sculpting filaments like PLA and PETG. However, it’s important to check the specifications of your printer to ensure it can handle these materials and provide the required level of detail.
4. Can I mix different filament colors while sculpting?
Yes, you can mix different filament colors to achieve unique and vibrant sculptures. This can be done by pausing the printing process at specific points and swapping filaments or by using dual extruder 3D printers that can simultaneously print with multiple colors.
5. Are there any special techniques for sculpting with filament?
Yes, there are various techniques that can enhance your sculpting with filament. For example, you can utilize supports to create overhangs, experiment with different layer heights to control the level of detail, and use post-processing techniques like sanding and painting to achieve desired results.
6. Where can I find creative 3D printing tutorials for sculpting with filament?
There are several online platforms, forums, and YouTube channels dedicated to providing creative 3D printing tutorials specifically for sculpting with filament. Some popular options include MatterHackers, MyMiniFactory, and YouTube channels like “3D Printing Nerd” and “Make Anything.”