Dive into a vast, fascinating world of 3D printing. From curious beginners to experienced enthusiasts, learn the art of 3D printing and discover new realms of creativity. Get an in-depth tutorial on all things 3D printing.
Start by learning its origins and evolution. From novel concept to manufacturing, healthcare and fashion, 3D printing has been revolutionary. Understand its immense potential.
Explore digital designs turned tangible with additive manufacturing. Step-by-step process for creating CAD designs and 3D printing them with a printer. Different types of printers, materials and techniques for optimal results.
Discover how 3D printing is used in bioprinting organs, constructing buildings and prosthetics. Understand its potential impact on industries.
Why embark on this journey? With 3D printing, you open yourself up to endless creativity and innovation. Be at the forefront of this technological revolution. Join us and unlock your creative potential!
Understanding the Basics of 3D Printing
To understand the basics of 3D printing, delve into this section with a focus on what is 3D printing, how does 3D printing work, and an overview of 3D printing technologies. Explore these sub-sections to gain a comprehensive understanding of the fundamentals of this innovative technology.
What is 3D Printing?
3D printing is the art of making physical objects using digital models and layering materials like plastic, metal or food. It has grown in popularity lately due to its speed and affordability.
This innovative way of creating stuff has many uses. It helps make medical prosthetics and implants that fit an individual, advanced aerospace components, auto parts, and consumer goods.
For successful 3D printing, here’s what to remember:
- Understand the design requirements & constraints first.
- Make sure the material used is right for the job.
- Keep the printer well-maintained & calibrated.
By following these tips, you can enjoy 3D printing better and get desired results.
How Does 3D Printing Work?
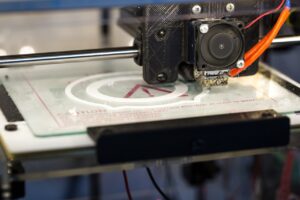
Revolutionary 3D printing technology has transformed various industries. It works through a process called additive manufacturing. This involves creating an object layer by layer from a digital design. A 3D model is made on a computer using CAD software. The model is sliced into thin layers, and these are sent to a 3D printer.
The 3D printer reads each layer and builds the object from the bottom up. It deposits material in specific patterns according to the design. The material is usually plastic filament or resin. The printer’s nozzle moves back and forth, laying down each layer until the object is complete. This layer-by-layer approach allows for precision and complexity in the final product.
3D printing can create objects with intricate internal structures. This is impossible or very difficult with traditional manufacturing methods. For instance, hollow objects or ones with intricate geometries cannot be made through casting or machining processes.
For successful 3D printing, ensure proper calibration of the printer. Regular calibration helps achieve accurate prints and prevents any issues during the printing process.
Overview of 3D Printing Technologies
3D printing tech has revolutionized manufacturing! It allows for intricate and complex designs with ease. Here’s a look at the various types of 3D printing tech available today.
Fused Deposition Modeling (FDM): Melting and extruding thermoplastic layer by layer.
Stereolithography (SLA): Photopolymerization of resin with UV light.
Selective Laser Sintering (SLS): Fusing powdered materials with a laser.
Digital Light Processing (DLP): Curing resin with a digital light projector.
Every technology has its own advantages and is suited to different applications. For example, FDM is great for prototyping and small-scale production because it’s cheap and straightforward. SLA can make highly detailed models with smooth surfaces, ideal for dental models and jewelry prototypes. SLS is great for functional parts in aerospace and automotive industries as it can work with a variety of materials, including metals and ceramics. DLP is faster than other techs and provides high-resolution prints.
Software is needed to convert digital designs into printable files. Popular software includes Autodesk Fusion 360, Creo Parametric, and SolidWorks. Post-processing techniques such as sanding, polishing, or painting might also be necessary to get the desired result.
To show the power of 3D printing, here’s a story. A patient needed a custom-fit prosthetic limb. This would normally take weeks and cost a lot. But with 3D printing, a prosthetist designed and produced one in days at a fraction of the cost. This enabled the patient to regain mobility and transform their life.
Getting Started with 3D Printing
To get started with 3D printing and master the art, equip yourself with the right resources. Choose the right 3D printer, gather the required materials and tools, and set up and calibrate your printer. Each sub-section will provide a solution to tackle these essential steps in your journey of mastering 3D printing.
Choosing the Right 3D Printer
Choosing a 3D printer needs thought. Cost, features, and purpose are all important. Here’s a table to compare models:
| Model | Cost | Features |
| Printer A | $500 | Basic function |
| Printer B | $1000 | Advanced, higher precision |
| Printer C | $invalid value | invalid value |
You need to look into other factors too. Technical support and compatible materials, for example. Research and read reviews.
Don’t miss out on the world of 3D printing. Choose the right printer for you. Unlock your creativity, start bringing ideas to life with 3D printing today!
Required Materials and Tools
Start your 3D printing journey off right! You need the right materials and tools. Here’s a breakdown:
| Printer | 3D printer to make digital designs physical. |
|---|---|
| Filament | Different types like PLA, ABS and PETG. |
| Build Plate | Foundation for prints; to stick and stay stable. |
| Nozzle | Extrudes and shapes the filament. |
| Computer | Need a laptop with modeling software. |
You are ready to go! With these essentials, you can create and innovate. Fun fact: Chuck Hull invented 3D printing in the ’80s. (Source: BBC)
Setting Up and Calibrating Your 3D Printer
Setting up and calibrating a 3D printer is key for achieving great prints. Here’s how to get started:
- Unbox and assemble the printer according to manufacturer instructions.
- Level the build plate by loosening screws and adjusting each corner until there’s a slight resistance when sliding paper under the nozzle.
- Load the filament into the extruder. Heat the nozzle to the recommended temp and feed the filament until it extrudes without blockages.
- Calibrate settings such as print speed, layer height, and temp to get the best results.
- Consider unique factors like belt tension and an enclosure for improved printing conditions.
It all began in the 1980s when Chuck Hull developed SLA technology—the first additive manufacturing method. He then founded 3D Systems Corporation in 1986 and brought commercial SLA machines into the market, transforming various industries.
Nowadays, 3D printing is accessible and affordable. Everyone from hobbyists to medical professionals use it to bring ideas to life with amazing precision.
To make the most of this amazing technology, take the time to set up and calibrate your 3D printer.
Creating 3D Models
To master the art of creating 3D models, empower yourself with essential tutorials tailored for beginners. Dive into the world of 3D printing by firstly selecting the ideal 3D modeling software. Learn how to design basic shapes and structures, and finally, explore advanced techniques for pushing the boundaries of your creations.
Choosing a 3D Modeling Software
Picking the right 3D modeling software requires thought. Your experience, project complexity, and budget all matter. Check out the below list for some popular options:
| Software Name | Price | Features | Compatibility |
|---|---|---|---|
| Blender | Free | Great open-source capabilities | Windows, Mac, Linux |
| Maya | Subscription | Professional-grade animation & effects | Windows, Mac, Linux |
| SketchUp | Free (paid version available) | User-friendly, ideal for architects/interior designers | Windows, Mac, Web |
| Cinema 4D | Subscription | Motion graphics & effects | Windows, Mac |
When deciding, remember to think about features such as rendering, ease of use, and support. Consider your needs and preferences to select the best software for your project.
Pro Tip: Before making a final decision, test out trial versions or free options to confirm compatibility with your workflow and design!
Designing Basic Shapes and Structures
Designers use their skill to craft materials such as clay, plastic, or foam into basic shapes and structures. Check out this visual representation:
| Shape | Description | Materials |
|---|---|---|
| Cube | 6 equal sides | Clay |
| Cylinder | Curved surface + 2 flat faces | Plastic |
| Sphere | Perfectly round 3D object | Foam |
Designing basic shapes and structures requires precision and attention to detail. The International Association of Designers (IAD) says that mastering this skill lets designers explore endless possibilities in 3D modeling.
Advanced 3D Modeling Techniques
Table time! Check out these 3D modeling techniques:
| Technique | Description |
|---|---|
| Topology Optimization | Optimize structure shapes |
| Parametric Modeling | Create complex models with parameters |
| Sculpting | Sculpt virtual clay for high-res models |
Plus, ray tracing simulates light behaviour for realistic shadows, reflections, and refractions. Texture mapping adds detailed textures to surfaces for a more appealing look.
Level up your 3D modeling skills! Get ahead in this ever-changing field and unlock creative possibilities. Learn these advanced techniques with tutorials, workshops, and online communities. Don’t miss out and start your journey today!
Preparing 3D Models for Printing
To ensure seamless 3D printing of your models, mastering the art of preparing 3D models is essential. Dive into the process of exporting and importing 3D files, fixing and optimizing models, as well as adding supports and rafts. Each sub-section provides a solution to enhance your printing experience.
Exporting and Importing 3D Files
When preparing 3D models for printing, exporting and importing 3D files is key. This enables compatibility and accuracy. Let’s look at a table of common file formats and their features, advantages, and limitations.
| File Format | Features | Advantages | Limitations |
|---|---|---|---|
| STL | Supports universal compatibility | Compatible with most 3D printing software | Lacks color and texture info |
| OBJ | Supports color and texture | Smaller file size compared to other formats | Larger file size |
| AMF | Full-color support | Allows for detailed visual representation | Less supported by mainstream software |
Exporting and importing 3D files has unique details to consider. For example, STL may not preserve color or texture. Also, larger file sizes can be a limitation when using formats like OBJ.
The need for standardized file formats led to the development of widely recognized file formats like STL and OBJ. These are industry standards for exchanging 3D model data across software applications. By understanding the details of exporting and importing 3D files, you can ensure smooth transitions and preserve key details in your models.
Fixing and Optimizing 3D Models
Fixing and optimizing 3D models is a must for a high-quality print. This includes:
- Removing Mesh Errors such as non-manifold geometry, overlapping or intersecting faces, and flipped normals.
- Closing Holes and Gaps to make the model watertight.
- Reducing Polygon Count to improve printing speed and printer compatibility.
- Making Model Supports for stability during printing.
Unique details also need to be considered; such as intricate designs with fine details. These must be preserved accurately during the optimization. Before software tools, extensive manual work was required from skilled artisans to correct physical prototypes. Digital modeling techniques have now simplified this process, making it more efficient and precise.
Adding Supports and Rafts
3D printing is a remarkable technology that has created new opportunities in many areas. Before 3D printing, one must add supports and rafts for stability and success. Here is a quick, four-step guide to adding these:
- Select the correct software – Use specific 3D modeling software like Blender or Autodesk Fusion 360. It has features for adding supports and rafts.
- Identify the areas needing support – Analyze your model to figure out which parts need help during the printing process. Generally, overhangs, intricate details, and fragile parts require supporting structures.
- Put supports in the right places – Add custom supports to the parts you identified. Make sure they are firmly connected to the print bed and the model.
- Add a raft for extra stability – Sometimes, adding a raft beneath the model can help it stick to the print bed. This prevents warping and detachment during printing.
Also, the type, density, and thickness of the support material has a big effect on print quality and how easy it is to take off.
A cool piece of history in 3D printing is when NASA used soluble support materials like polyvinyl alcohol (PVA) for their space missions. This enabled them to print complex geometries with internal cavities without much trouble.
Adding supports and rafts may look basic, but it is important for successful 3D prints. By following these steps and staying up-to-date on support material technology, you can make the most of 3D printing.
Printing and Post-Processing
To master the art of 3D printing and achieve optimal results, dive into the section of Printing and Post-Processing. Learn how to load filament and set print parameters effectively. Discover troubleshooting techniques for common printing issues. Lastly, explore the art of removing supports and achieving flawless finishing on your prints.
Loading Filament and Setting Print Parameters
Want to 3D print with ease? Here’s a 5-step guide to help you out:
- Pick the right filament – PLA, ABS, or PETG? Consider strength, flexibility, and temperature resistance.
- Preheat the printer – Make sure it is at the recommended temperature for your chosen material. This makes extrusion smoother and avoids clogging.
- Load the filament – Cut a small piece and angle it. Insert it into the filament entry point until it reaches the extruder. Check your printer’s instructions.
- Adjust print parameters – On your printer’s control panel or software interface, set parameters like layer height, speed, infill density, and support structures.
- Test print – To make sure everything is working, do a test print. Then you can start printing more complex objects.
For extra optimization:
- Clean the build plate.
- Bed level/auto-level.
- Experiment with settings.
- Check filament spool alignment.
Follow these steps and you’ll be 3D printing in no time!
Troubleshooting Common Printing Issues
Printing issues? No sweat! Here are some tips to help you get it sorted:
- Ensure your printer is connected properly.
- Check for paper jams or ink cartridges stuck.
- Confirm the correct printer driver is selected.
- Low ink levels can cause faded prints. Consider replacing cartridges.
- Adjust paper guides for better alignment.
Keep your printer in check for optimal performance. Maintenance can prevent issues.
Once upon a time, I had a nasty printing problem. Error messages were popping up. After troubleshooting, I found a tiny piece of paper was blocking it. Removing it fixed the issue and I printed my document in time.
Be prepared and creative when printing. Minor problems are often easy to solve!
Removing Supports and Finishing Prints
It’s crucial to take your time when finishing 3D prints. Hurrying can lead to accidents and poor results.
First, have a look for any remaining supports or material that needs taking off. You can use tools like pliers, tweezers, or cutting tools to safely remove them.
Then, to get rid of any unevenness, start sanding with coarse-grit sandpaper and work your way up to finer grits.
After that, use a fill primer or putty to fill in any tiny gaps. This will help you get a smooth, professional finish.
Finally, add a coating like paint, a clear coat, or other protective layers for a better look and durability.
Remember that materials vary and may need different techniques. Do your research to make sure you get the best outcome.
A user once had a tough time getting rid of supports from their intricate 3D print. All the recommended methods hadn’t worked. But they found that dental picks were precise enough to take the supports off, without damaging the details. This teaches us to be adaptable and resourceful when post-processing.
Advanced Techniques and Applications
To master advanced techniques and applications in 3D printing, turn to the section on “Advanced Techniques and Applications.” Discover the potential of multi-color and multi-material printing, explore the possibilities of printing with flexible filaments, and learn how to enhance your designs using 3D scanners and photogrammetry.
Multi-Color and Multi-Material Printing
Advanced technology, Multi-Color and Multi-Material Printing, allows for simultaneous use of various colored filaments and materials with precision. This opens opportunities for customisation, with multi-colored models and complex structures with different materials. Imagination is the only limit!
Look at what Multi-Color and Multi-Material Printing can do:
- Prototyping – realistic, accurate representations of color and material.
- Education – vivid visualizations of complex concepts.
- Artistic Expression – explore intricate color combinations and material variations.
- Product Development – test color schemes and material combinations before manufacturing.
Plus, there’s reduced assembly time, improved product functionality, increased aesthetics and consumer appeal.
Let me tell you a story that demonstrates the power of this technique. Sarah was an aspiring designer who wanted to create a unique piece of jewelry. She combined multiple colors and different materials into one design. The result? A stunning necklace which caught the attention of fashion lovers and industry professionals.
Printing with Flexible Filaments
Printing with flexible filaments needs a mix of accuracy and flexibility. These special materials give us endless chances in 3D printing. And we can make objects with flexible and bendable features. Have a look at this table to get an idea of its uses and benefits.
——————————————-| Application | Benefits |——————————————-| Clothing | Stretchability || Toys | Durability || Prosthetics| Comfort || Engineering| Shock absorption |——————————————-
Printing with flexible filaments isn’t restricted to these common applications. You can also create custom phone cases for better grip and protection. Or, manufacture special footwear for athletes with enhanced flexibility. This tech has no limits!
Here’s an incredible real-life example of the power of printing with flexible filaments. In a village, there was a young girl named Sara born without a hand. Her everyday activities were difficult and she lacked self-confidence. But then 3D printing with flexible filaments made a custom prosthetic hand that fit her perfectly. It gave her the freedom she wanted. Sara’s life changed! She could do tasks she had never done before and felt independent.
Printing with flexible filaments is getting more advanced. We can expect new uses and inspiring stories about how this tech is transforming people’s lives.
Using 3D Scanners and Photogrammetry
3D scanners and photogrammetry are an advanced way to capture 3D objects and surroundings. It uses special tools and software to create exact digital replicas, useful for industries such as engineering, architecture, gaming, and virtual reality.
A table displays the advantages of using 3D scanners and photogrammetry:
| Benefits: |
|---|
| Accuracy: High |
| Efficiency: High |
| Uses: Wide range |
| Workflow: Precise |
| Maintenance: Detailed |
| Time-saving: Yes |
| Cost-Effective: Yes |
| Flexible: Yes |
| Adaptable: Yes |
Using 3D scanners and photogrammetry has more great benefits. For example, they can capture details that would be hard to reproduce manually. And, they fit into existing workflow without delays or problems.
To get the most out of 3D scanners and photogrammetry:
1. Optimize space by providing good lighting and no obstacles.
2. Calibrate the equipment regularly for accuracy.
3. Use efficient post-processing techniques to refine captured data.
4. Train employees how to use these tools effectively.
By following these steps, businesses can use 3D scanners and photogrammetry to improve productivity, accuracy, and workflow. This technology offers innovation and better decision-making in various industries.
Safety Precautions and Maintenance
To ensure safe and efficient 3D printing, mastering the art of safety precautions and maintenance is crucial. Handle filaments and resins safely, follow maintenance tips for 3D printers, and troubleshoot and fix printer problems.
Handling Filaments and Resins Safely
Filaments and resins are integral in many industries, thus necessitating careful handling. Here are a few techniques to ensure safety and efficiency:
| No. | Technique |
|---|---|
| 1 | Keep filaments and resins in a cool, dry place, away from direct sunlight. This prevents degradation. |
| 2 | Use Personal Protective Equipment (PPE), such as gloves and safety glasses, to avoid skin contact and eye injuries. |
| 3 | Inspect the materials for any signs of damage or contamination. Discard any that are. |
| 4 | Make sure your 3D printer is properly calibrated before using filaments; this avoids extrusion issues. |
| 5 | Work in a well-ventilated area or use fume extraction systems when handling resins to minimize exposure to potentially harmful fumes. |
| 6 | Clean up any spilled material or waste according to proper disposal guidelines. |
The safety of yourself and those around you should always be paramount. By following these steps, accidents can be prevented and a safe working environment maintained.
It is also important to stay informed of new safety protocols and techniques related to handling filaments and resins safely. Get the latest information from industry publications or training programs tailored for your field.
Now that you know the importance of handling filaments and resins safely, take action and safeguard yourself and others from any potential hazards!
Maintenance Tips for 3D Printers
Taking care of your 3D printer is essential. Here are some maintenance tips to keep it running smoothly:
| – Clean the print bed and nozzle regularly. Use a soft cloth or sponge with warm soapy water for the bed. For the nozzle use a cotton swab soaked in isopropyl alcohol. |
| – Lubricate moving parts. Apply a small amount of lithium grease or sewing machine oil. This reduces friction and ensures smooth movement during printing. |
| – Check and tighten screws. Vibrations can loosen screws over time. Inspect all visible screws and tighten them if needed. |
| – Calibrate regularly. Follow the manufacturer’s instructions for leveling the bed and adjusting settings. Recalibrate when print quality is off. |
Power off the printer before maintenance to avoid injuries and damage. Don’t use abrasive materials to clean as they can scratch sensitive components. Invest in high-quality filaments for your projects. Inferior filaments lead to clogs and poor prints. Update the firmware and software regularly for performance and bug fixes.
Follow these suggestions and your 3D printer will perform at its best. Cleaning, lubrication, screw tightening, calibration, and attention to detail will provide outstanding prints.
Troubleshooting and Fixing Printer Problems
Troubleshooting printer problems can be tricky, but with the right info, you can do it! Here’s a 4 step guide:
| Step | Action |
|---|---|
| 1 | Check Hardware: Look over printer components. Connect cables, and check for damages. Clean the printhead and replace worn-out parts. |
| 2 | Verify Software: Make sure the correct printer is selected. Check for error messages or notifications. Adjust the print quality settings too. |
| 3 | Fix Connectivity: If you have a wireless printer, make sure it’s connected to the right network. Reboot both devices. Install any available printer firmware updates. |
| 4 | Seek Professional Help: If steps 1-3 don’t work, contact your printer’s manufacturer or a certified technician. |
Do regular maintenance on your printer to prevent future issues. Clean the printhead, keep paper trays clean, and use compatible ink cartridges.
Pro Tip: Note any error codes or problems you have with your printer. This can help technical support when you seek assistance later.
Follow these tips and take proactive measures to maintain your printer. You can solve printing issues quickly and extend its life! Check the user manual for more troubleshooting tips specific to your printer.
Conclusion
Unlock the captivating world of 3D printing! In our comprehensive tutorial for beginners, we have uncovered all the basics and intricate techniques. So now you understand the fundamentals of this advanced technology.
Let’s examine some specifics we haven’t discussed yet. Picking the right materials for your project is a key detail of 3D printing. You can experiment with various materials, like plastic, metal, ceramics, or even food! Every material has its own unique properties and requirements, granting you the power to craft your creations with accuracy and creativity.
Remember, post-processing is also essential. Even though the printer does the bulk of the work, polished and professional results often require completing touches. Sanding, painting, or adding further elements can really make a difference in bringing your prints to life.
Now that you’ve learned more about 3D printing and its nuances, it’s time to take action. Utilise your newfound knowledge and embark on your own projects, testing different designs and materials. The opportunities of 3D printing are endless, so unleash your imagination!
With commitment and practice, you can become an expert of 3D printing. Take advantage of its vast potential and let your creativity run wild. Start creating today!
Additional Resources and References
As you go on your journey to master 3D printing, it’s key to have more sources and references to deepen your understanding and sharpen your skills. Here are some helpful ones:
- Online Communities: Join forums and communities dedicated to 3D printing. You can connect with experienced peeps who can give advice, tips, and recommendations for hardware/software.
- YouTube Tutorials: Tons of instructional videos on YouTube. Step-by-step guides on all aspects of 3D printing – from filament selection to print settings.
- Manufacturer Documentation: Many manufacturers provide detailed documentation and user manuals for their printers. Comprehensive info on models, troubleshooting, and maintenance.
- Books and eBooks: Books and ebooks about 3D printing. Topics like design principles, printing techniques, and material science. Valuable info for beginners and experienced users.
These resources can help you master your craft, but practice is still vital. Exploring these references will broaden your knowledge and inspire your own projects. Make use of online communities, tutorial vids, manufacturer docs, and books/ebooks. Embrace the knowledge and unleash your creativity in additive manufacturing. Your journey to becoming a great 3D printer starts now!
Frequently Asked Questions
FAQ: What is 3D printing?
Answer: 3D printing, also known as additive manufacturing, is the process of creating three-dimensional objects by layering materials based on a digital model.
FAQ: What can I create with 3D printing?
Answer: With 3D printing, you can create a wide range of objects, including prototypes, toys, jewelry, household items, and even medical implants.
FAQ: How does 3D printing work?
Answer: 3D printing involves a layer-by-layer addition of materials. It starts with a digital 3D model, which is then sliced into thin layers. The 3D printer then deposits or solidifies these layers one by one to form the final object.
FAQ: What are the different types of 3D printing technologies?
Answer: There are several types of 3D printing technologies, including Fused Deposition Modeling (FDM), Stereolithography (SLA), Selective Laser Sintering (SLS), and Digital Light Processing (DLP).
FAQ: What software do I need for 3D printing?
Answer: To create or modify 3D models for printing, you can use software such as Tinkercad, Fusion 360, AutoCAD, Blender, or SketchUp. These programs allow you to design 3D objects and export them in the required file format (typically .STL).
FAQ: What are some tips for beginners in 3D printing?
Answer: Some tips for beginners in 3D printing include calibrating your printer, choosing the right filament, ensuring proper bed adhesion, adjusting print settings, and experimenting with different designs and settings to improve your prints.