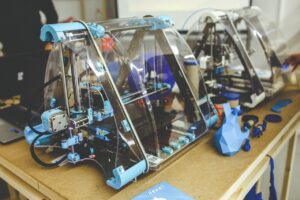
In the world of 3D printing, precision is the key. Calibration is the first step. It’s a complex process to make sure everything is perfect. Each layer is delicately sculpted, creating accuracy and precision.
Calibration isn’t just a technicality, it’s an art. Adjusting temperatures, bed leveling – everything must be precise. Each calibration step gives the machine a brushstroke, making it a skilled craftsmanship tool.
Beyond the technical side, understanding calibration reveals its innovative potential. Engineers and enthusiasts can explore boundaries previously thought impossible. With knowledge of how variables affect print quality, they can strive for perfection.
We take a look back to the pioneers of 3D printing. Through trial and error, they unlocked calibration secrets. After countless experiments, they created what we have today. Their dedication shows that precision maintenance is an ongoing journey for improvement.
The Importance of Calibrating 3D Printers
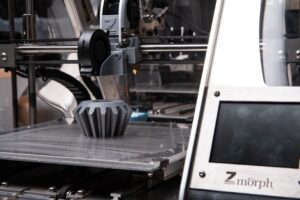
Calibrating 3D printers is key for reaching perfection. It guarantees that the machine works accurately and generates top-notch prints. Without proper calibration, problems like misalignment, under-extrusion, or over-extrusion can crop up, leading to flawed prints.
Efficient calibration means that all parts of the 3D printer are cooperating to make exact and accurate prints. It requires adjusting settings like nozzle height, filament diameter, and print bed leveling. By fine-tuning these parameters, the printer can manufacture intricate designs with the utmost accuracy.
What’s more, calibrating 3D printers is a continuous process due to wear and tear on components over time. Regular tests and adjustments are necessary to keep optimal performance. Neglecting calibration can cause reduced print quality and even machinery breakdowns.
This brings us to John’s story. He got his first 3D printer and was excited to begin printing his designs. But he didn’t focus on calibration and started printing without proper adjustments.
John was discouraged when his initial prints were far from ideal – they lacked precision and had obvious flaws. He decided to understand the technical aspects of calibrating his printer better. After researching extensively and making meticulous adjustments based on expert advice, John observed remarkable improvements in the quality of his prints.
This story underscores the importance of taking the time to calibrate 3D printers before starting any complex projects. It emphasizes that investing effort into understanding and implementing proper calibration techniques is essential for achieving outstanding results in 3D printing endeavors.
Understanding Precision Maintenance
Precision maintenance is a must for 3D printing to get exact and great results. It requires careful tuning and calibrating of the printer’s components for perfection. Let’s dive in and understand this necessary process!
To understand precision maintenance better, let’s examine each element:
- Printer Calibration: Adjusting settings for accurate dimensions and layer thickness. Things like the extruder, bed leveling, and temperature control need to be tuned for consistent prints.
- Material Handling: Storing printing materials correctly is critical to maintaining print quality. Prevent moisture or degradation with proper handling.
- Regular Maintenance: Check and maintain your printer often. Clean the nozzle and replace worn-out parts for optimal performance.
- Software Updates: Keep firmware up-to-date for bug fixes, new features, and improved file format compatibility.
- Quality Control: Quality control measures are important to identify inconsistencies or defects early on. This allows for adjustments and correction before the print is finalized.
By following precision maintenance practices, 3D printing enthusiasts can get precise and high-definition prints regularly.
Pro Tip: Document calibration settings, troubleshooting procedures, and changes made to your printer’s hardware and software for future reference.
Step-by-Step Guide to Calibrating a 3D Printer
For optimal print quality and accuracy, calibrating a 3D printer is essential. Here’s a step-by-step guide to get you started:
- Level the Print Bed. Use paper or a feeler gauge to make sure the nozzle and bed are parallel. Adjust the bed so each corner is equal distance from the nozzle.
- Calibrate Extruder Steps. Mark a specific distance on filament and command the printer to extrude that length. Compare it to the desired length and adjust the extruder steps in printer settings.
- Fine-tune Temperature Settings. Test different temps for your filament material, starting with manufacturer recommendations. Adjust based on print results.
- Check Belt Tension. Make sure the belts aren’t too tight or too loose, preventing movement during printing.
- Test Speeds and Accelerations. Increase speeds and accelerations and monitor print quality until you reach your desired speed-accuracy balance.
Also, every 3D printer model may need unique calibration, so refer to the manual for instructions tailored to your machine.
Charles W. Hull was the inventor of stereolithography, a precursor technology to modern 3D printers. Thanks to technological advances, calibrating printers is now more user-friendly and accessible, so users can achieve better prints.
Tips and Tricks for Maintaining Precision
Precision is key to successful 3D printing. Here are some tips and tricks to keep your prints consistently accurate.
- Calibrate your bed level regularly for optimal adhesion.
- Check and clean the nozzle to avoid clogs.
- Use high-quality filament with consistent diameter.
- Optimize slicing settings, such as layer height, print speed, and extrusion temperature.
- Maintain a stable environment with controlled temperature and humidity.
- Regularly inspect and maintain mechanical components like belts, rods, and bearings.
For extra precision, try using a digital caliper. Mesh optimization is also useful for intricate designs. A famous designer found misalignment in their 3D printer rods caused issues with prints. After meticulous realignment, the prints regained precision, resulting in increased success.
Precision maintenance is an ongoing process. With these tips and customized considerations, you can achieve great results in 3D printing.
Conclusion
Precision maintenance is key for 3D printing success. Calibrate printers to up the quality of prints. Alignment and cleanliness must be maintained for accurate prints. Inspect and replace worn-out parts to avoid breakdowns.
Additionally, store and handle filaments carefully. Moisture absorption can cause defects in prints. High-quality filaments that are compatible with printer specs give optimal results.
Surprising fact: precision maintenance began in industrial manufacturing to reduce downtime and improve efficiency. (Source: ReliablePlant.com)
Additional Resources and References
To better understand precision maintenance for 3D printing, here is a list of useful resources and references:
- Resource Name: “PM Techniques”Type: Book
Description: Comprehensive guide to precision maintenance techniques.
- Resource Name: “Advanced Calibration”Type: Video
Description: Instructional video on advanced calibration methods.
- Resource Name: “Troubleshooting Guide”Type: Article
Description: In-depth article with troubleshooting tips.
- Resource Name: “Maintenance Checklist”Type: Checklists
Description: Printable checklists to follow maintenance procedures.
- Resource Name: “Online Forums”Type: Online
Description: Join forums to connect with experts.
- Resource Name: “Manufacturer’s Manual”Type: Documentation
Description: Refer to manual for specific maintenance instructions.
It’s important to stay informed about industry advancements and research papers.
Pro Tip: Regularly calibrating your 3D printer will improve print quality and reduce errors.
Frequently Asked Questions
Q: Why is calibration important for 3D printing?
A: Calibration is crucial for achieving optimal print quality and accuracy. It ensures that the printer’s hardware components are aligned properly, resulting in precise and consistent prints.
Q: How often should I calibrate my 3D printer?
A: The frequency of calibration depends on various factors such as the printer model, usage, and environmental conditions. In general, it is recommended to calibrate your 3D printer whenever you notice a decline in print quality or after any major changes, such as replacing components.
Q: What are the common signs that indicate the need for calibration?
A: Some common signs include inconsistent layer height, extrusion issues, warping, poor surface finish, or overall print inaccuracies. If you notice any of these, it’s likely that your printer needs calibration.
Q: How can I calibrate my 3D printer?
A: The calibration process may vary depending on the printer model, but it typically involves adjusting settings such as bed leveling, nozzle height, extrusion rate, and temperature. Consult your printer’s manual, manufacturer’s website, or online tutorials for specific calibration instructions.
Q: What tools do I need for calibration?
A: The tools required for calibration may vary based on your printer’s design, but common tools include a leveling tool, feeler gauge, calipers, and a temperature gun. Additionally, calibration software or built-in features on your printer can assist in the process.
Q: Can I automate the calibration process?
A: Yes, some advanced 3D printers have built-in automated calibration features that simplify the process. These printers use sensors and algorithms to measure and adjust the necessary parameters automatically. However, manual fine-tuning may still be required for certain aspects of calibration.